How to Make Sautéed Spinach (Simple & Flavorful Side Dish)
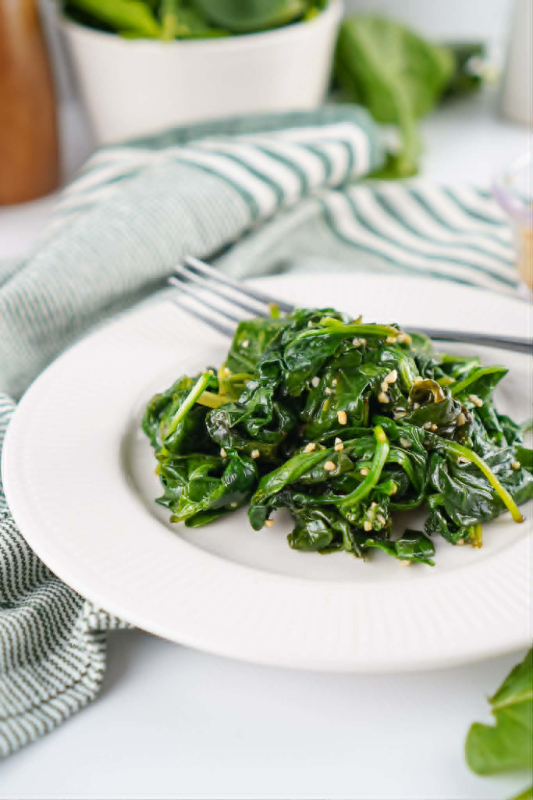
Sautéed spinach is one of those simple, reliable dishes that every home cook and homesteader should have in their back pocket. It comes together in just minutes, yet it delivers a rich, savory flavor that pairs well with almost any meal. Whether you serve it as a quick side dish or fold it into something more elaborate like a creamy dip or pasta, sautéed spinach offers both versatility and nutrition without requiring much effort.
Fresh spinach cooks down quickly, transforming from a large pile of leaves into a tender, flavorful dish in a matter of minutes. This makes it perfect for busy evenings or last-minute additions to your meal. With just a few ingredients and a single pan, you can turn a simple bunch of greens into something satisfying and delicious.
Why Sautéed Spinach Works So Well
Spinach has a naturally mild flavor that becomes richer and slightly earthy when cooked. Sautéing enhances that flavor while preserving its vibrant color and nutrients. The key to success lies in cooking it quickly over moderate heat and allowing the leaves to gently wilt rather than overcook.
Adding garlic and olive oil at the beginning builds a flavorful base that infuses every bite. As the spinach softens, it absorbs those flavors, creating a dish that feels more complex than its short ingredient list suggests. This method also keeps the texture tender without becoming mushy, which is essential for an enjoyable result.
Recipe: Sautéed Spinach
Prep Time: 2 Minutes
Cook Time: 5–7 Minutes
Yields: About 1 Cup Sautéed Spinach
Ingredients for Sautéed Spinach
5 ounces fresh spinach
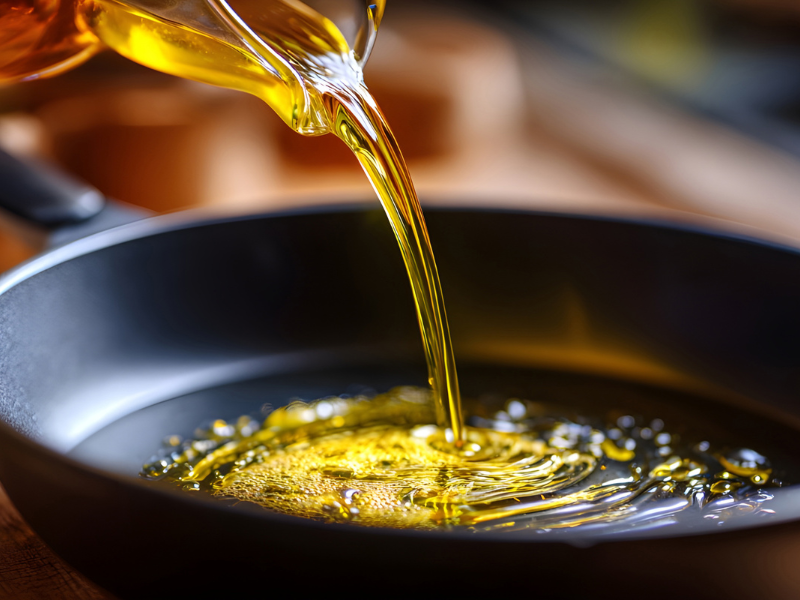
1 tablespoon olive oil
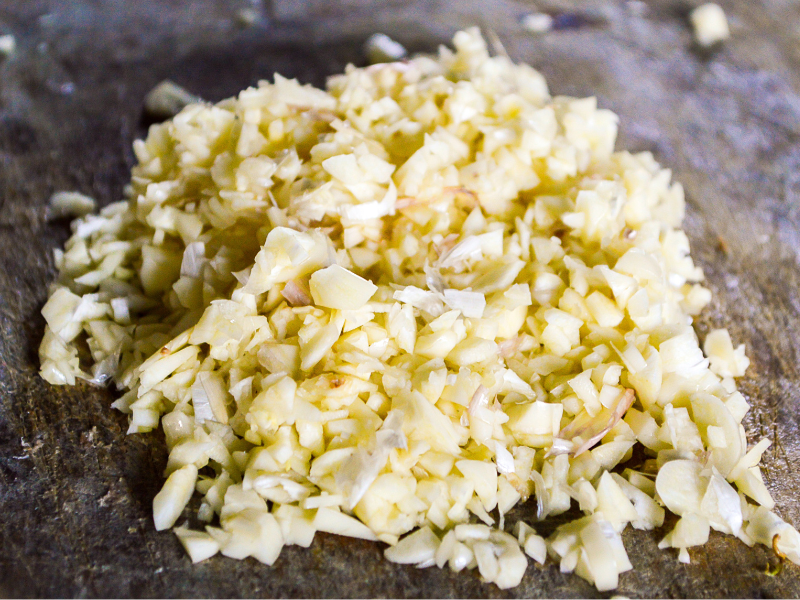
1 teaspoon minced garlic
¼ teaspoon salt
¼ teaspoon pepper
Items Needed
Directions to Make Sautéed Spinach
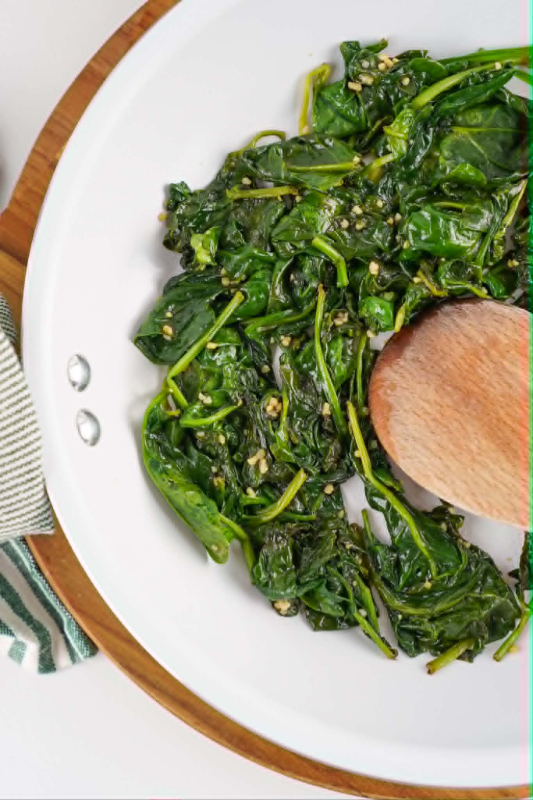
To begin, place a medium skillet on the stove over medium heat. Add the olive oil and minced garlic while the pan is still cool. This step allows the garlic to warm and infuse the oil without burning, which helps create a smooth, balanced flavor.
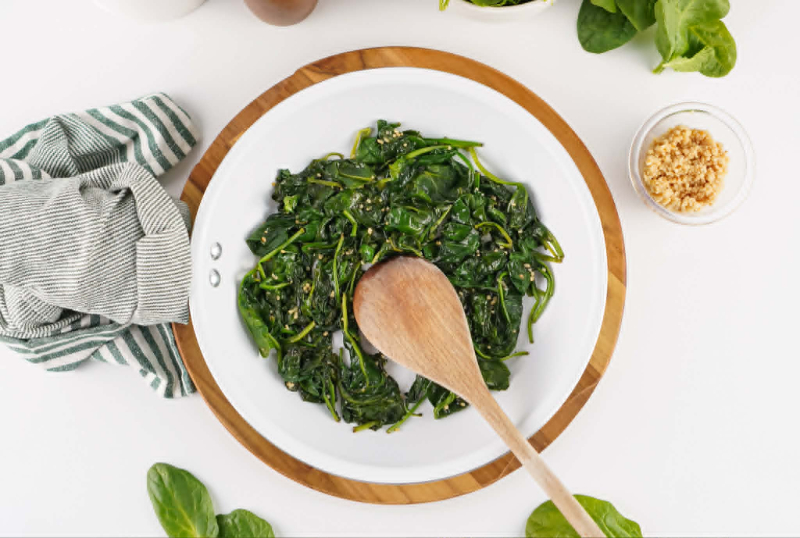
As the pan heats and the oil begins to thin, start adding the spinach one handful at a time. At first, it may seem like too much to fit in the pan, but spinach shrinks quickly as it cooks. As each handful wilts down, add more until all the spinach is in the skillet. Gently move the leaves around with a spoon or tongs to prevent sticking or burning, but avoid over-stirring so the leaves stay intact.
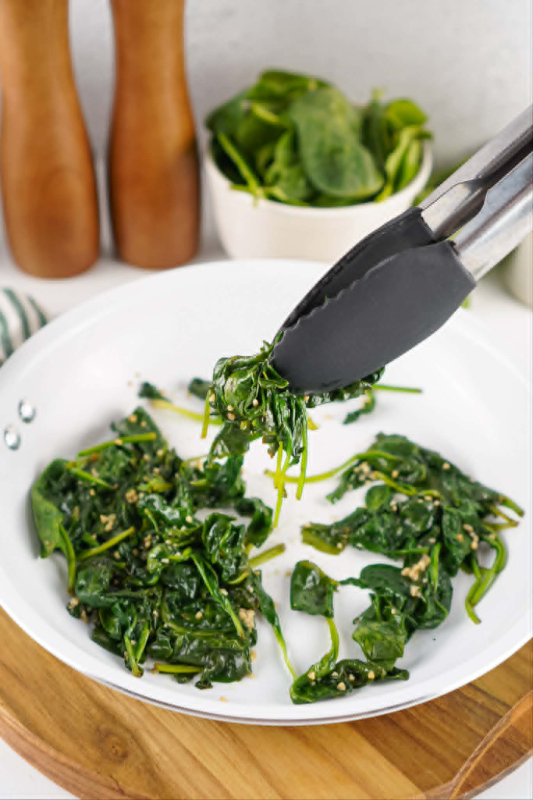
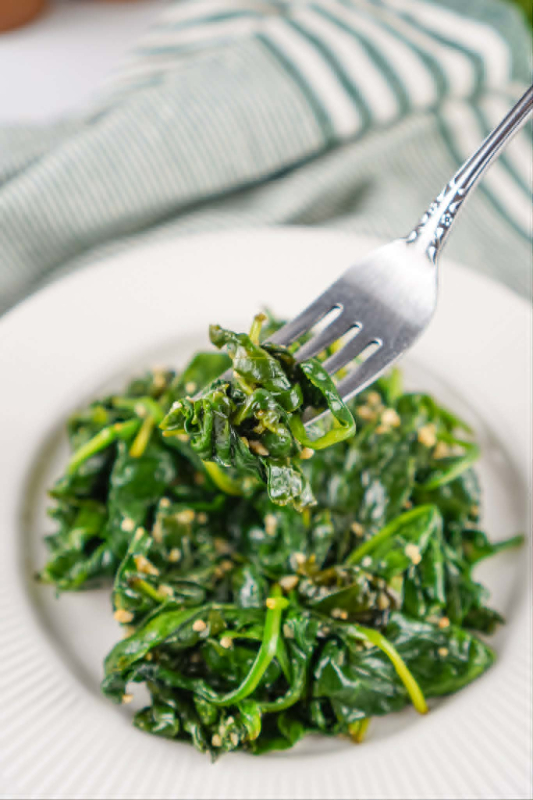
After about three minutes, the spinach will have reduced to roughly half its original volume. At this point, sprinkle in the salt and pepper. Continue cooking for another two to three minutes, stirring occasionally, until the spinach reaches your preferred texture. Some people enjoy it just lightly wilted, while others prefer it more tender.
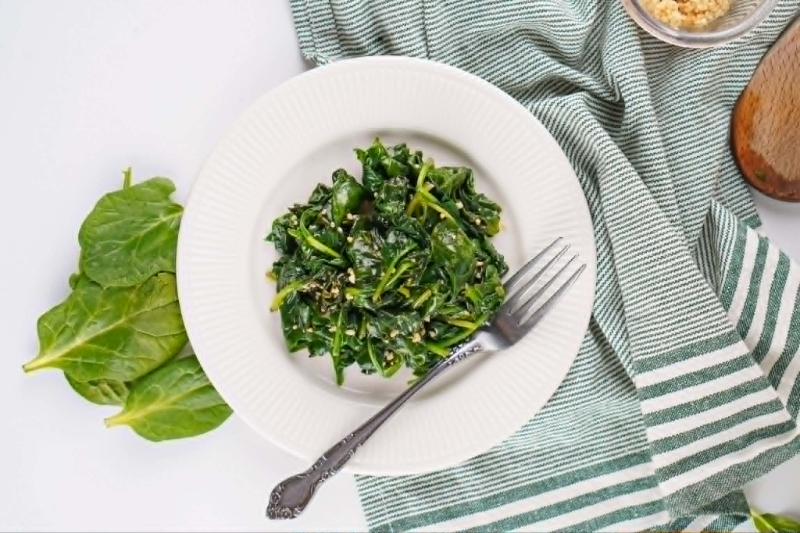
Once done, remove the spinach from the heat and serve immediately for the best flavor and texture.
Storage Tips
If you have leftovers, allow the spinach to cool before transferring it to an airtight container. Store it in the refrigerator for up to three days. Reheat gently on the stove or in the microwave, just until warmed through. Freezing is not recommended, as it can negatively affect both texture and flavor.
Easy Variations and Flavor Options
One of the best things about sautéed spinach is how easy it is to customize. You can adjust the flavor profile by adding extra seasonings such as garlic powder, onion powder, or even a pinch of red pepper flakes for a little heat. A squeeze of lemon juice at the end can also brighten the dish and add a fresh contrast to the richness of the oil.
You can use any type of fresh spinach for this recipe. Baby spinach offers a more delicate texture, while mature spinach provides a slightly heartier bite. Both work beautifully, so choose whichever you have on hand or prefer.
Helpful Tips for Best Results with Sautéed Spinach
Keep the heat at a moderate level, especially when starting the garlic and oil. If the pan is too hot, the garlic can cook too quickly and develop a bitter taste. A slower, steadier heat allows the flavors to develop more evenly.
Avoid overcrowding the pan all at once. Adding the spinach gradually ensures it cooks evenly and prevents steaming instead of sautéing. Gentle handling also helps maintain the structure of the leaves, resulting in a more appealing final dish.
Adjust the seasoning to suit your taste. Spinach has a mild flavor, so even small tweaks can make a noticeable difference.
A Simple Homestead Favorite
Sautéed spinach is a perfect example of how simple ingredients can create something truly satisfying. It fits seamlessly into a homestead kitchen, where practicality and flavor go hand in hand. With minimal prep and quick cooking time, it’s an easy way to add a nutritious, homemade touch to any meal.
Once you get comfortable with this basic method, you’ll find yourself returning to it again and again. It’s quick, adaptable, and always dependable—everything a good homestead recipe should be.
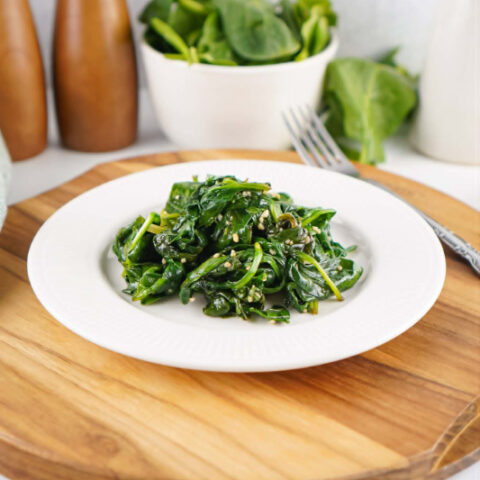
Sautéed Spinach
Sautéed spinach is a quick and flavorful side dish that comes together in just minutes using simple ingredients.
Ingredients
- 5 Ounces Fresh Spinach
- 1 Tablespoon Olive Oil
- 1 Teaspoon Minced Garlic
- ¼ Teaspoon Salt
- ¼ Teaspoon Pepper
Instructions
- Place a medium-sized skillet over medium heat on the stove and add the olive oil and garlic while the pan is still cool.
- As the pan starts to warm up and thin the oil, add the spinach, a handful at a time. As it shrinks a bit and makes more room, add more spinach, until all the spinach has been added. Gently move the spinach around so it doesn’t burn, but don’t beat it up.
- When the spinach has reduced by about half (about 3 minutes into cooking), sprinkle it with salt and pepper.
- Cook the spinach for another 2-3 minutes or until the desired texture has been reached. Enjoy!
Notes
Do not freeze. Store in an airtight container, in the fridge, for up to 3 days.
If you would like to adjust the flavor of the spinach, you can include additional seasonings such as garlic powder, etc.
You can use your favorite spinach for this recipe. I’ve used baby spinach and regular spinach, and both turned out perfect.
Adjust seasonings to your preferences.
Do not have your pain too hot when adding the garlic and oil or it will cook too fast. You want it to be a slower cook for the best results.
Nutrition Information
Yield 2 Serving Size 1/2 cupAmount Per Serving Calories 84Total Fat 8gSaturated Fat 1gUnsaturated Fat 6gSodium 329mgCarbohydrates 4gFiber 2gSugar 0gProtein 2g
Nutrition information is calculated using an ingredient database and should be considered an estimate. In cases where multiple ingredient alternatives are given, the first listed is calculated for nutrition. Garnishes and optional ingredients are not included.
-
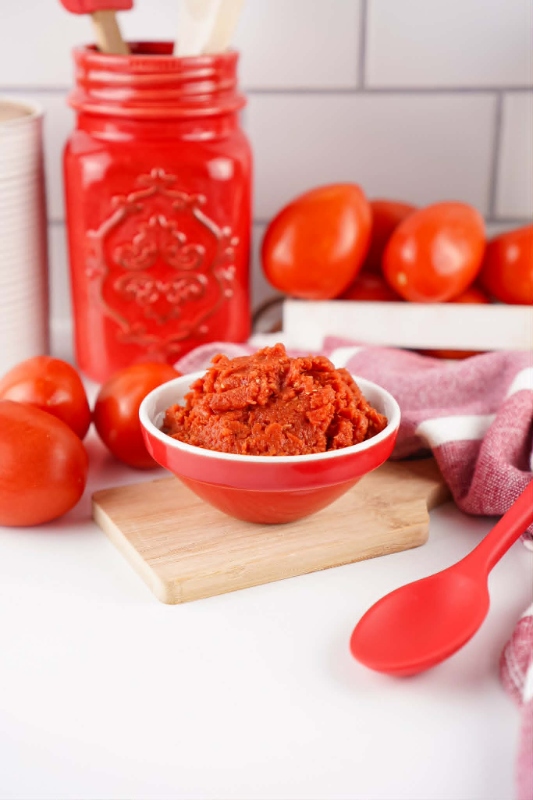
Easy Rustic Homemade Tomato Paste (No Additives)
Make rustic homemade tomato paste with fresh tomatoes. No additives, rich flavor, and perfect for preserving your garden harvest.
-
Homemade Hot Dog Buns (Soft and Easy Homestead Recipe)
These homemade hot dog buns bake up soft, golden, and perfect for any backyard meal. The dough comes together with simple ingredients and a gentle rise that keeps each bun tender. They hold their shape without feeling heavy, making them ideal for hot dogs, sausages, or easy weeknight sandwiches.
-
How to Freeze Homemade Stock
Freezing homemade chicken stock is a great way to preserve its flavor and nutrition. Let the stock cool completely, then strain out any solids. Pour into freezer-safe containers, leaving space for expansion. Ice cube trays or souper cubes are perfect for small portions. Once frozen, transfer cubes to a labeled freezer bag. Stock keeps well in the freezer for up to 6 months.
-
Make your own pasta
Welcome to the delightful world of homemade pasta! If you’ve ever savored the taste of fresh pasta, you know there’s nothing quite like it. Making pasta from scratch may seem daunting, but it’s simpler than you think and deeply satisfying. In this post, we’ll guide you through the process, from flour to fork! The Joy…
-
Homemade Sourdough Bread
Welcome to the wonderful world of homemade sourdough bread! There’s something almost magical about the process of making sourdough. It’s not just baking; it’s an age-old tradition, a craft that has been passed down through generations. Today, I want to share with you how you can start this journey in your own kitchen. The Magic…
-
Homemade Cheese Making
Welcome to the art of homemade cheese making! If you’re lucky enough to have dairy cows, you’re already on the path to creating delicious, fresh cheese right in your own kitchen. Let’s embark on a journey from milking your cows to savoring the rich flavors of your homemade cheese. The Joy of Cheese Making Making…