
Garlic Dill Pickle Canning Recipe
Pickles are a tasty treat enjoyed by people all around the world. But have you ever wanted to make your own pickles in the comfort of your own home? If so, this garlic dill pickle canning recipe is for you! With just a few simple ingredients and easy steps. Anyone can make their very own delicious homemade pickles that’ll be sure to impress family and friends alike.

This garlic dill pickle recipe will show you how to use both traditional techniques and modern innovations. You will learn to create flavorful home-canned pickles that everyone will love. By combining fresh spices with carefully prepared vegetables, you’ll be able to develop unique flavors unlike any other store-bought variety. And since these cans last up to six months in the pantry, you’re guaranteed plenty of time to savor every bite!
Ready for an exciting new way to enjoy one of your favorite snacks? Then let’s get started on learning how to make garlic dill pickles right at home – it’s easier than you think!
Overview
The sweet and sour crunch of a homemade garlic dill pickle is like taking a trip back in time. From the fresh dill heads to the vinegar brine, each component comes together perfectly to create the perfect snack. This recipe for preserving these delectable treats will help ensure that you can enjoy them all year round.
For this garlic dill pickle canning recipe, you’ll need one pound of pickling cucumbers, two quarts jars, 1/3 cup of canning salt, four cups white vinegar, eight tablespoons sugar, six cloves garlic (minced), two teaspoons dried crushed red pepper flakes and three large fresh dill heads. Pickling cucumbers are smaller cucumbers than regular ones.They are typically shorter and bigger around. Once you’ve gathered your supplies it’s time to make your hot brine for this easy recipe. Combine the vinegar, salt, sugar and spices in a pot over medium heat until everything has dissolved into a syrup-like consistency. Then turn off the heat and let cool before adding it to your jars with the cucumbers inside.
Seal up your filled jar tightly and store in a dark place or refrigerator for up to three months. Be sure to check on them every so often as they may spoil if left too long! Enjoy your delicious homemade garlic dill pickles!
Safety Precautions if Canning
It’s important to take safety precautions when canning pickles and not making refrigerator dill pickles. With the right equipment and care, you can safely preserve a jar of delicious garlic dill pickles. Here are five tips for safe canning:
- Use hot jars by preheating in boiling water or washing with hot soapy water. This will help prevent cracking during the processing time.
- Wear protective gloves while handling hot jars. Also use a jar lifter to ensure that the containers don’t slip from your grasp. The last thing you want is a scalding jar of pickles!
- Check each jar before sealing it up. Make sure there are no air bubbles trapped inside and wipe away any spills around rims.
- Only use a pressure canner for this recipe as other methods may lead to food-borne illnesses if not done correctly.
- Follow the recommended processing times carefully. Failure to do so could also cause spoilage or contamination of the finished product – your lovely jar of pickles!
The key takeaway here is to be mindful and patient throughout the entire canning process. Proper technique requires attention and precision, but yields tasty rewards in return! So put on those oven mitts, keep an eye on your timer, and get ready for some delicious homemade garlic dill pickles!

Ingredients And Utensils
To make an amazing garlic dill pickle, you’ll need the right ingredients and utensils. Start by gathering white vinegar, fresh garlic cloves, pint jars, dill seed, mustard seed, black peppercorns, canning jars and your favorite pickling spices. Make sure you have enough of everything to fill all the jars!
The next step is to prepare the jars for the pickles. Wash them in hot soapy water, then rinse with boiling water before filling each one with the chosen spices. Pack each jar tightly with a headspace of 1/2 inch between the top of the liquid and lid. Finally, secure lids onto each jar using finger tight pressure. You’re now ready to begin canning!
By following these easy steps you will be able to create delicious homemade garlic dill pickles that are perfect for any occasion. Enjoy!
Selecting The Right Pickles
It’s time to select the right pickles for your garlic dill pickle canning recipe. You have many options when it comes to getting quality cucumbers and other ingredients. So be sure to do some research before you start this project. When selecting cucumbers for homemade pickles, try to find ones that are fresh and crisp. If you’re lucky enough to live near farmers markets, these are usually the best place to get them. Refrigerator pickles tend to produce better results than room temperature pickles because they maintain their crispness as they ferment in vinegar or brine. I always buy organic fresh cucumbers if I don’t have any left from my own garden. If you don’t have either option just pick some up at your local grocery store.
When making garlic dill pickles, it is important to choose cucumbers with few blemishes and dry skins. The size of the cucumber should also be taken into consideration; small-to-medium sized cucumbers work best for canning pickles since larger ones often don’t fit properly in jars or taste too bitter when cooked. Additionally, make sure any vegetables you add such as peppers or onions are cut into uniform sizes. This will ensure they cook evenly when canned.
Canning garlic dill pickles requires patience and skill but if done correctly will result in delicious crispy treats! To avoid problems like soggy or flavorless pickles, follow recipes closely and use high-quality ingredients whenever possible. With a little bit of effort, you’ll soon be enjoying the rewards of homemade Garlic Dill Pickles!
How To Make Dill Pickles Crisp When Canning?
Making crisp pickles is an art that can be mastered with practice. The trick to making perfectly crunchy, homemade dill pickles lies in the right combination of ingredients and high heat. Kirby cucumbers are ideal for this purpose as they provide a snappy bite when cooked properly. To make garlic dills or butter pickles extra crispy, you need to pay close attention while canning them.
The first step is to ensure the mixture has enough vinegar and salt so that it doesn’t become too soft during cooking. For quick pickles, use boiling water instead of brine to speed up the process – but don’t forget to add plenty of spices! A classic garlicky-dilly flavor comes from combining equal parts minced garlic and fresh dill in your recipe. Adding sugar will also help bring out the flavors and create crisper pickles.
Finally, heat is key when making any type of canned pickle. Keeping them on a low simmer until the liquid starts bubbling allows for all those delicious flavors to mingle together before being sealed into jars for storage. Make sure not to overcook them; otherwise, you won’t get that desired snap after opening your jar of homemade goodies! With these tips and tricks in mind, you’ll have no problem creating flavorful, super-crispy pickle recipes every time.
Why Did My Garlic Turn Blue In My Canned Pickles?
Making sure the garlic turns out right can be a tricky business when it comes to canning pickles. The first time you make a batch of garlic dill pickles, it’s normal to have some questions about how best to achieve success. One issue that might arise is why your garlic has turned blue in your jars of pickled cucumbers. This phenomenon is quite common and there are several reasons for it.
To start off with, combine vinegar, water, salt and spices in a large saucepan over medium-high heat. Then add fresh dill sprigs or one head of dill per jar at the bottom of the jar before adding the cucumbers. When filling the jars with cucumber slices, use cold tap water instead of boiling water so as not to overcook them. It’s also important not to overcrowd the jars; pack only enough cucumbers into each jar that they will fit comfortably after being topped off by liquid brine mixture from the pot on the stovetop. Be sure to place lids securely on top of each jar once filled and cooled down then process according to instructions outlined in Ball Blue Book guide for safe home canning.
In many cases where garlic turns blue during canning, this indicates that too much acid was used in preparing the solution prior to processing which caused an imbalance between alkaline and acidic levels resulting in discoloration within the jarred contents. Another possible cause could include leaving ingredients like cloves or peppercorns too close to the surface of liquid inside each jar while submerged under brine. Thus producing a chemical reaction upon contact with air leading towards eventual color change during fermentation stage post-canning process.

Sterilizing Jars And Lids
Begin the process of canning your garlic-dill pickles by sterilizing jars and lids. First, gather all necessary supplies: a hot water bath canner, cups apple cider vinegar, clean towels, and filled jars with small cucumbers or whole pickles. Place the jar and lid into the hot water bath canner for 10 minutes to ensure that it is completely sanitized. Once you are sure everything is thoroughly cleaned. Take out each item one at a time using tongs and place on a clean towel. Make sure to pay attention to any debris left on the top of the jar or blossom end of the pickle as this could interfere with proper sealing during canning.
Next, add 2 tablespoons of apple cider vinegar per quart size jar before filling them up with your delicious homemade garlic-dill pickles. This will help preserve their crunchy texture while also adding flavor to the brine solution inside. Lastly, make sure there are no bubbles in each jar before capping it off securely with its lid. Now your jars are ready to be processed via hot water bath canning!
Sealing The Jars
Now that all the ingredients are added to your Garlic Dill Pickle Canning Recipe, it’s time for sealing the jars. Home canning is easy with this printable recipe card and a few simple steps!
Start by ensuring your jars are clean and free from any debris. Place them into a rolling boil of water to sterilize them before filling with cucumbers and pickling solution. To ensure an airtight seal, use new lids each time you make this easy canning recipe. Wipe rims with vinegar then seal. Once they’ve been secured on top of the jar. Place back into boiling water and let simmer for 10 minutes or until lids have sealed. Remove carefully using tongs – now you’re ready to enjoy some amazing crunchy dill pickles made in your own home!
Let jars cool completely before storing away in the pantry or refrigerator. And don’t forget to share with friends and family – because everyone loves homemade canned goods!
Processing Garlic Dill Pickles In Water Bath Canner
Canning recipes are a great way to make your own pickles. The National Center for Home Food Preservation recommends that you use a water bath canner if you want to make the best pickles. This method of processing involves placing jars filled with vegetables, spices, and an inch of water into a large pot and slowly bringing it to a boil. The heat will help seal the jar lids, keeping all the flavors inside while also making sure they’re safe enough to eat at home. Once heated, let the cans cool off before transferring them to shelves or storing them in cabinets.
For those who prefer dill pickle chips rather than large dill heads, slicing cucumbers ahead of time is essential for achieving the desired results. Place sliced cucumbers in vinegar mixture overnight and then strain out any excess liquid when ready for canning. After filling sterilized jars with cucumber mix, follow the same instructions as above for boiling and cooling down before storage. For extra flavor, add crushed garlic cloves or horseradish root during your initial brine soak!
No matter how far away from traditional methods one may go with their canning recipe. Following the steps outlined by the National Center remains a key factor in ensuring a safety-first mindset and ultimate success with homemade canned pickles!
Refrigerator Canning Method For Garlic Dill Pickles
Refrigerator canning is an easy and fun way to make delicious garlic dill pickles with minimal effort. With this method, you don’t need any special equipment or a lot of time. But it does require some extra space in your fridge. To start, choose the vegetables that you want to pickle – cucumbers are classic for making traditional dill pickles, but green beans work nicely as well. You’ll also need fresh garlic cloves, white vinegar and spices such as mustard seed, dill weed and red pepper flakes if you’d like to add some heat to your pickles.
Once all of your ingredients are prepped, combine them all in a large pot on the stovetop and bring the mixture to a boil before reducing the heat and simmering for about 15 minutes until everything is cooked through. After you have cooked everything though, transfer the mixture into sterilized jars and let cool completely at room temperature before placing them in the refrigerator overnight or even up to two weeks depending on how strong you want your flavor profile to be. The best part? This refrigerated canning recipe creates delicious bread-and-butter style spicy pickles that will last up to three months when stored properly!

Storing Canned Pickles
Have you ever made a garlic dill pickle canning recipe and wondered how best to store them? Canned pickles are an incredibly shelf-stable way of preserving cucumbers. But there is still some work involved in making sure they last as long as possible. Luckily, storing canned pickles is quite straightforward if you follow the right steps.
The first step for properly storing your homemade canned pickles is determining where to put them. For most home canners, this means finding a cool dry place away from direct sunlight that does not fluctuate too much temperature-wise throughout the year. This could be a pantry or closet in your kitchen or even a basement depending on the climate of your area. Additionally, many people choose to purchase shelving units specifically designed for food storage so their cans do not get damaged by everyday wear and tear.
What Variety of Pickles?
When choosing which type of cucumber to use when creating your own garlic dill pickle canning recipe, smaller varieties tend to make better candidates since they have less water content than larger ones and therefore will keep longer once preserved. You may also want to consider buying organic cucumbers from local grocery stores or other sources that adhere to strict standards for pesticide use – just be sure to read any disclosure policy before purchasing! Alternatively, you can grow your own cucumbers with seeds found at garden centers or online. We bought seeds for pickling cucumbers. I chose them because they are generally shorter and bigger around than normal cucumbers.
No matter what method you choose for obtaining the raw materials needed for making homemade canned pickles, proper storage is key if you want them to last as long as possible without going bad or losing flavor over time. Make sure you find a cool dry place away from direct sunlight and small cucumbers (organic preferably) so that your garlic dill pickle canning recipe yields delicious results each time!
Serving Ideas
Once you’ve canned your garlic dill pickles, it’s time to start thinking about how to serve them. Here are four great ideas to get the creative juices flowing:
1. **Garlic Dill Pickle Pizza** – Add a unique twist to your pizza night by topping it with chunks of freshly made garlic dill pickles! It might sound strange, but trust us—the combination of salty and sweet is sure to be a hit.
2. **Pickled Deviled Eggs** – Create an exciting appetizer for any occasion by mixing diced garlic dill pickles into classic deviled eggs. The crunchy texture will add another layer of flavor that everyone will love.
3. **Pickle Sandwich Spread** – Make sandwiches more interesting by using a spread made from mayonnaise or cream cheese mixed with mashed-up garlic dill pickles! This simple condiment can really take lunchtime up a notch.
4. **Salads & Sides** – Chop up some garlic dill pickles and use them as toppings on salads or side dishes like potato salad and coleslaw; they’ll add just the right amount of tanginess and crunch!
If you’re looking for ways to make your meals stand out, try incorporating these delicious homemade pickles in different recipes! They won’t disappoint – we promise!
Variations On Garlic Dill Pickle Canning Recipe
Want to add a unique twist to your garlic dill pickles? Try experimenting with herbs and spices. A teaspoon of cumin, coriander, oregano, thyme, or chili powder adds extra flavor. You can even create your own kosher-style dill pickles!
For a more exotic taste, add grated ginger and turmeric for depth. Swap regular white vinegar for white wine or apple cider vinegar for a new flavor profile.
Don’t forget sugar! Pickling liquid usually includes sugar, but you can use brown sugar, honey, or agave syrup for extra sweetness. These variations will make your pickles stand out!
Troubleshooting Tips
Troubleshooting pickle canning takes patience and attention to detail. Watch for common issues that may arise during the process.
Use the right salt-to-acidity ratio. Too much or too little can cause spoilage. Always use clean quart jars and lids. Dirt or debris can lead to contamination.
Monitor processing time closely. Overcooking in a water bath or pressure canner makes pickles soft and mushy.
Before storing, check each jar carefully. Ensure all lids are sealed and no contents have spoiled.
Garlic Dill Pickle Canning Recipe
Yes, you can make your own garlic dill pickles! With just a few simple steps and easy-to-find ingredients, you’ll have crisp, flavorful pickles in no time.
Start by preparing the cucumbers. Rinse them thoroughly and keep them in a sink of cold water until you’re ready to pack the jars. Clean and inspect your pint jars, making sure there are no chips or cracks. Keep them warm in a 250°F oven until needed.
Next, make the brine. In a medium pot, combine 4 cups of water, 4 cups of white vinegar, and 1/2 cup of pickling salt. Bring the mixture to a boil, stirring until the salt dissolves completely.
Now, fill the jars. Remove a warm jar from the oven, then add one garlic half and a flowering dill head to the bottom. Pack cucumbers tightly into the jar, ensuring they fit snugly. Add the remaining garlic half and 1/2 teaspoon of pickling spices. Pour hot brine over the cucumbers, leaving 1/2 inch of headspace. Seal with a hot lid and tighten the ring until snug but not too tight.
For processing, place the filled jars into a hot water bath canner, ensuring they are covered by at least 1 inch of water. Process at a rolling boil for 10 minutes at sea level or 20 minutes above 3,000 feet. Once done, carefully remove the jars and let them cool overnight.
The next day, check the seals. The lids should be slightly concave, indicating a proper seal. Refrigerate any unsealed jars. Let your pickles sit in the brine for a few weeks to develop their full flavor. Then, enjoy your homemade garlic dill pickles!
When done correctly, garlic dill pickles stay fresh for up to a year. Follow these tips for perfect pickles every time!

Garlic Dill Pickle Canning Recipe
Ingredients
- 5 lbs pickling cucumbers
- 5 garlic cloves, peeled and halved lengthwise
- 2 1/2 teaspoons pickling spices
- 5 fresh flowering dill heads
Brine Mixture
- 4 cups water
- 4 cups white vinegar
- 1/2 cup pickling salt or sea salt
Instructions
CANNING PREP
- Fill a hot water bath canner with water, ensuring the canning rack is in place. Bring to a boil.
- Scrub and trim pickling cucumbers, then keep them in a sink of cold water until ready to pack.
- Wash and inspect six pint jars and lids for chips, rust, or dents.
- Place jars upside down in a large cake pan with 1–2 inches of water. Heat in a 250°F oven for 10 minutes and keep warm.
- Put lids and rings in a pot of water. Heat until just beginning to boil.
- Boil water in a kettle.
- In a medium pot, combine water, vinegar, and salt. Bring to a boil until the salt dissolves.
- Clean and prep garlic and dill.
FILLING THE JARS
- Remove one jar from the oven at a time.
- Place one garlic half at the bottom, followed by a flowering dill head.
- Pack cucumbers tightly into the jar until no more fit.
- Wedge the remaining garlic half into the jar, then add 1/2 teaspoon of pickling spices.
- Pour hot brine over the cucumbers, leaving 1/2 inch of headspace.
- Immediately cover it with a hot lid and screw on the sealing ring until snug but not overly tight.
HOT WATER PROCESSING
- Place each filled jar into the canning rack. Repeat until all jars are loaded.
- Adjust the water level in the canner as needed—remove excess if too full or add boiling water from the kettle if needed.
- Lower the canning rack into the canner, ensuring jars are covered by at least 1 inch of water.
- Process at a rolling boil for:
- 10 minutes at sea level
- 20 minutes above 3,000 feet (or refer to a hot water processing chart for exact times).
- Add boiling water as needed to keep jars submerged.
- Carefully remove jars and place them on the counter to cool overnight.
- Check seals—the lids should be slightly concave. Refrigerate any unsealed jars.
- Let pickles sit in the brine for a few weeks before enjoying!
Notes
For a milder tang, add 1 teaspoon of granulated sugar to the brine.
Nutrition Information
Serving Size 20Amount Per Serving Calories 11Sodium 32mgCarbohydrates 1 gramg
Conclusion
Canning dill pickles is a fantastic way to capture the flavors of summer and enjoy them all year long. The process may seem daunting at first, but with careful preparation and proper safety measures, you’ll have delicious homemade pickles in no time. In the U.S. alone, over a million jars of pickles are canned each year!
Making your own pickles not only saves money but also brings a sense of accomplishment. With just a few simple ingredients and basic kitchen tools, you can create a flavorful batch of garlic dill pickles. Whether you keep them for yourself or share with your friends and family, homemade pickles are a treat worth savoring.

Beyond Digestion: How Parasites May Impact Energy, Skin, Mood, and Immunity
Parasitic infections don’t always just cause obvious digestive symptoms. In some cases, they may also contribute to fatigue, skin concerns, mood changes, and immune system imbalances. Learn how these hidden infections can affect overall wellness, the signs to watch for,…
Halotherapy: What It Is and How It Can Help
Learn what halotherapy is, how salt therapy may support respiratory health, who should avoid it, and ways to try it at home.

Why Healing the Gut Starts With Environment, Not Supplements
Emma Magnolia is a holistic health educator, therapeutic bodyworker, and lifestyle practitioner who discusses that supplements can help us have our best gut health possible, they are not the foundation. Instead, it is the daily conditions surrounding digestion that best…

How to Make Homemade Chocolate Chips (Simple & Budget-Friendly)
Make homemade chocolate chips with simple ingredients and honey. Easy, natural, and perfect for baking. They are also cost effective.
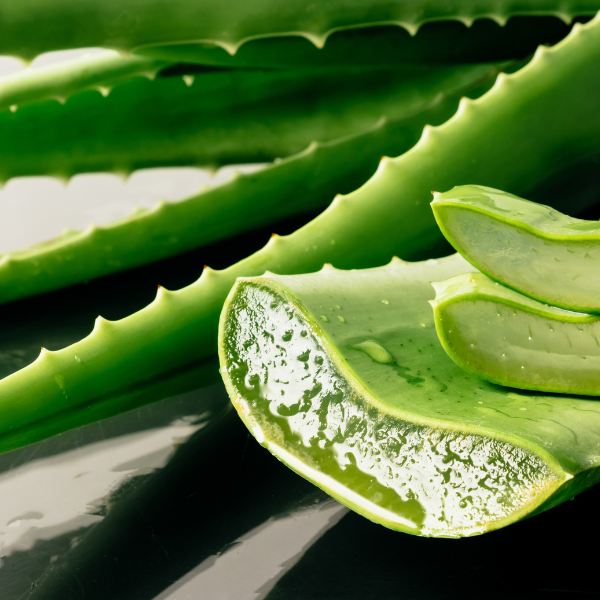
Growing Aloe Vera and Using It for Home Remedies
Learn how to grow aloe vera and use it for simple home remedies like burns, skin care, and natural healing.
Follow Us on Social Media
The Oklahoma Homesteader Facebook Page
U.S. Homesteading for Beginners Facebook Group


Pickles are a delightful snack that brings joy to many. Making your own garlic dill pickles at home is a rewarding experience. The combination of fresh dill, garlic, and vinegar creates a unique flavor. Storing them properly ensures you can enjoy them for months. Have you tried experimenting with different spices to enhance the taste?