Strawberry Kiwi Popsicles with Stevia: A Naturally Sweet Summer Treat
When Oklahoma summers hit full swing, nothing beats a cold, refreshing treat that’s both delicious and good for you. These Strawberry Kiwi Popsicles with Stevia are a go-to recipe in our homesteader kitchen. They’re naturally sweetened, dairy-free, and full of fruity flavor—perfect for cooling off without the sugar crash.
Plus, they’re fun to make with kids and a great way to use up ripe fruit before it spoils. Let’s walk through how to make these easy popsicles at home. Check out our Homemade Ginger Cantaloupe Popsicles.

Ingredients for Strawberry Kiwi Popsicles
This simple recipe uses just a few clean ingredients you may already have on hand:
- 2 kiwi, peeled and sliced
- 5–6 strawberries, washed and sliced
- 500ml coconut milk
- ¼ cup (40g) chia seeds
- 2 teaspoons Stevia (or to taste)
You can easily swap in other fruits or plant-based milks depending on what you have or grow. These popsicles are very forgiving and versatile.
Step 1: Soak the Chia Seeds
In a large mixing bowl, combine the coconut milk, chia seeds, and Stevia. Stir well to distribute the seeds and sweetener evenly. Let the mixture sit for 30 to 40 minutes so the chia seeds can expand and take on a gel-like texture. This step gives the popsicles a rich, creamy consistency and adds fiber and omega-3s.

Step 2: Prep the Fruit for Your Strawberry Kiwi Popsicles
While the chia mixture is resting, peel and slice your kiwi into pieces about 0.5 cm thick. Do the same with your washed strawberries. Thin slices work best so you can see the colorful fruit through the popsicle mold and get even bites of flavor in each one.

Step 3: Fill the Molds
Place 2 kiwi slices and 2 strawberry slices into each popsicle mold. Feel free to add more if you want fruit in every bite. Once the fruit is in place, pour the chia coconut milk mixture into each mold, filling it to the top. Gently tap the molds on the counter to remove air bubbles, then insert the popsicle sticks. So, depending on your mold size, expect 6 to 9 popsicles total.
Step 4: Freeze Until Firm
Place the molds in the freezer and let them sit undisturbed for at least 5 hours, or until completely frozen. For best results, freeze overnight.
Once frozen, remove the Strawberry Kiwi popsicles from the molds by running a little warm water over the outside of the molds to loosen them. Serve immediately or store in a freezer-safe container.

Tips for Perfect Strawberry Kiwi Popsicles
- Slice the fruit thin so it freezes evenly and looks beautiful through the mold.
- Adjust sweetness to your taste—Stevia can vary in strength depending on the brand.
- Use different milk like almond or soy if you don’t have coconut milk. Just aim for a similar texture.
- Add a splash of vanilla extract or a squeeze of lime juice to boost flavor.
- Make a double batch and store extras in the freezer for hot afternoons or quick, healthy treats.

A Great Way to Use Seasonal Fruit
If you grow your own strawberries or trade fresh produce with neighbors, this is a great way to enjoy summer’s bounty. Popsicles like these are a staple on our homestead when the garden is overflowing and we want to avoid food waste.
You can also experiment with other fruits like peaches, mango, raspberries, or blueberries—whatever’s in season or on sale.

Strawberry Kiwi Popsicles with Stevia
A creamy, fruity treat made with clean ingredients—perfect for summer and freezer-friendly for anytime snacks.
Ingredients
- 2 kiwi, peeled and sliced
- 5–6 strawberries, washed and sliced
- 500ml coconut milk
- ¼ cup (40g) chia seeds
- 2 teaspoons Stevia (or to taste)
Instructions
Soak the Chia Seeds In a large bowl, combine coconut milk, chia seeds, and Stevia. Stir well and let sit for 30–40 minutes until thickened.
Prep the Fruit Peel and slice the kiwi and strawberries into thin slices, about 0.5 cm thick.
Fill the Molds Add 2 kiwi and 2 strawberry slices into each popsicle mold. Pour in chia mixture to the top. Tap molds to release air bubbles and insert sticks.
Freeze Until Firm Freeze for at least 5 hours or overnight. To release, run warm water over the molds briefly.
Notes
Use thin fruit slices for visual appeal and even freezing.
Adjust Stevia to your preferred sweetness.
Swap in almond or soy milk for a different base.
Add vanilla extract or lime juice for a flavor boost.
Great for using up seasonal or homegrown fruit!
Healthy, Easy, and Kid-Approved
These strawberry kiwi popsicles are perfect for families looking to cut back on refined sugar while still enjoying a sweet treat or fun dessert. The chia seeds offer a slight crunch and texture that even picky eaters find fun, and you’ll feel good knowing exactly what went into them.
Let me know if you’d like a printable recipe card or kid-friendly variation. These popsicles are going to be a hit all summer long.
-
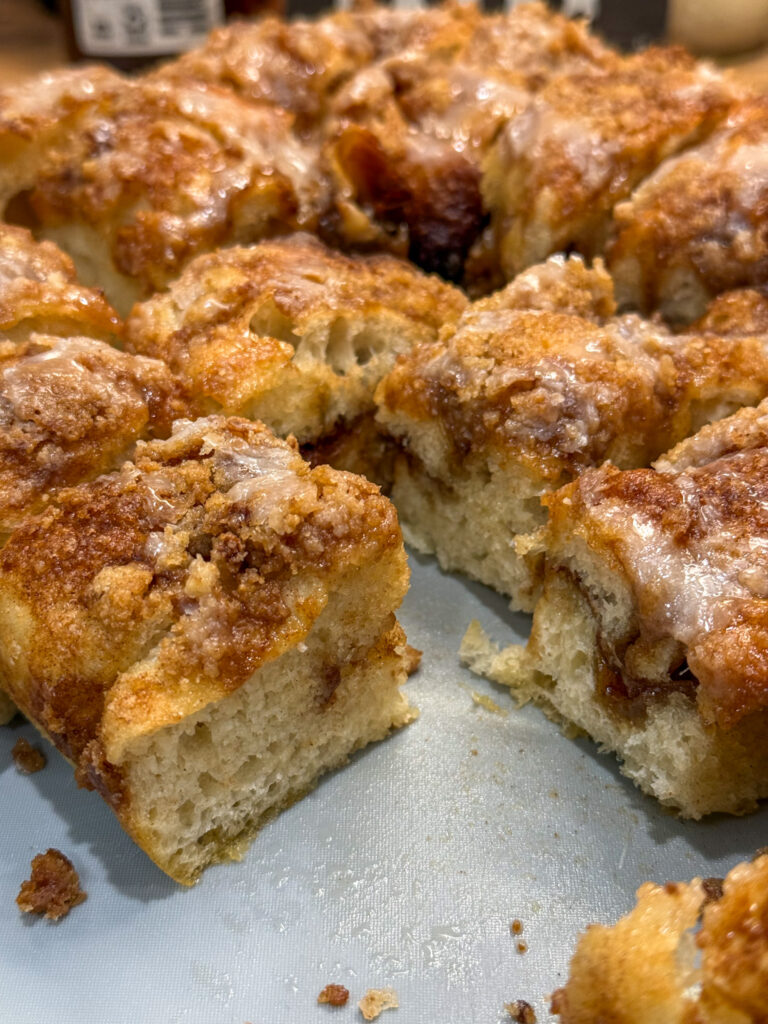
Cinnamon Roll Focaccia Bread Recipe (Better Than Cinnamon Rolls!)
Try this cinnamon roll focaccia recipe with buttery cinnamon filling, crumble topping, and sweet icing. Better than cinnamon rolls.
-
Heavy Metal Toxins: How to Avoid Them Naturally
Learn what heavy metal toxins are, common sources, and simple ways to reduce exposure naturally in your daily life.
-
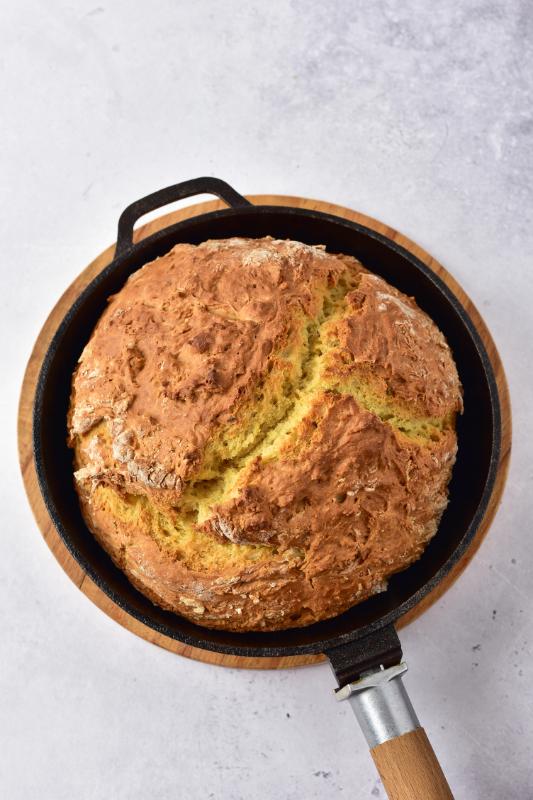
How to Make Traditional Irish Soda Bread at Home
This easy Irish soda bread recipe brings old-fashioned comfort to your homestead kitchen. The loaf bakes with a golden crust, tender center, and rich buttery flavor. Simple pantry ingredients and a quick mixing method make this bread perfect for busy days. Serve warm slices with soup, stew, or fresh butter straight from the table.
-
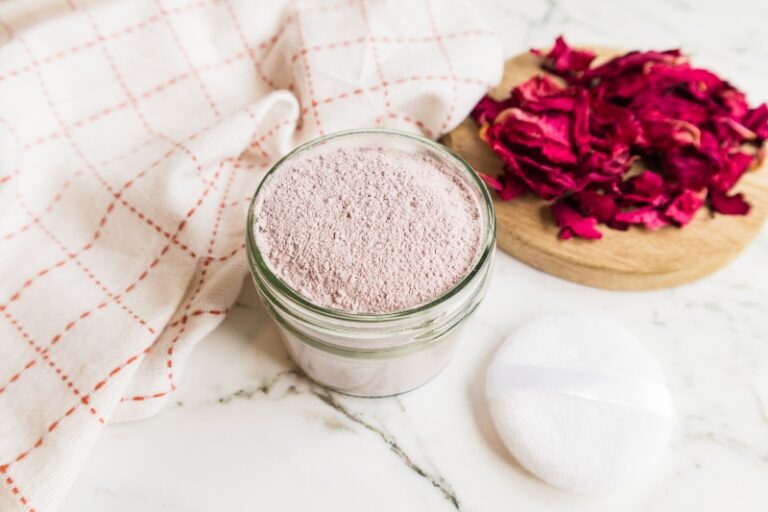
How to Make Homemade Rose Body Powder
Learn how to make homemade rose body powder with simple ingredients for naturally fresh, soft skin and a light floral scent.
-
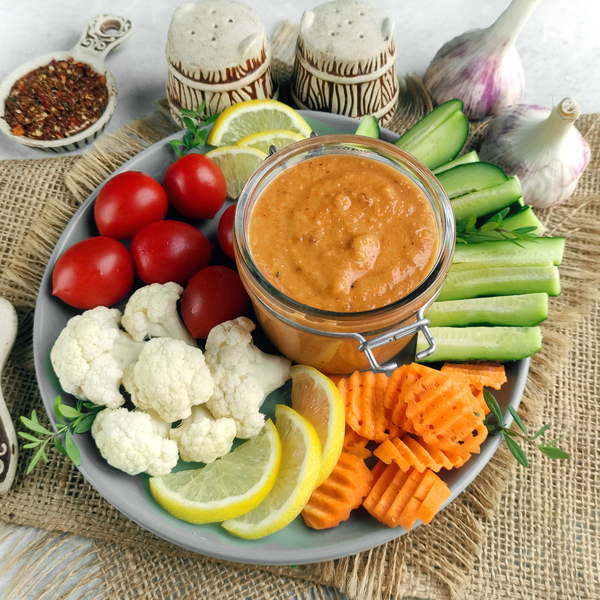
Homemade Thai Peanut Sauce Recipe (Better Than Takeout)
Make homemade Thai peanut sauce that’s creamy, flavorful, and better than takeout. Perfect for noodles, chicken, and veggies.
-
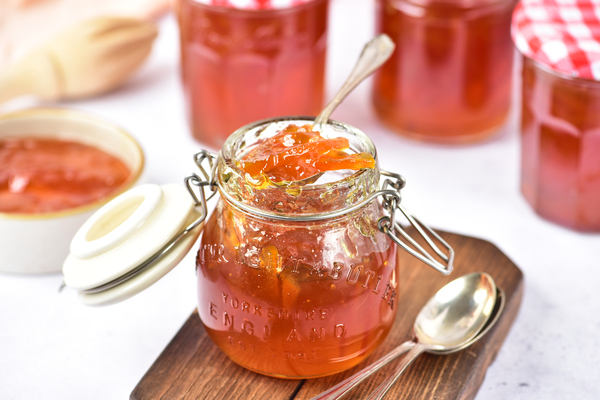
How to Make Homemade Orange Marmalade from Scratch
Learn how to make orange marmalade from scratch with fresh citrus. Sweet, tangy, and perfect for toast or gifts.